Hunting knife sharpening is something you have to do every time before you head out.
You can use your hunting knife to prepare game for cooking, bone skinning, cleaning fish, and even self-defence, it’s got to be as sharp as can be to be useful in all of those situations.
Knife sharpening has a lot more to it than people think. You can find countless forum posts online about people saying that they brought their knife to a grindstone or grit brick, pulled it against it, and then were perplexed that nothing happened.
Well, that’s because there’s an art form behind this bit of science.
Here’s some tips on how to sharpen your knife the right way!
The Basic Design of a Hunting Knife
Most hunting knives do not have a serrated edge. They’re primarily used for clearing games, and to do that, you need something smooth and sharp.
Otherwise, you would just end up manipulating the meat and/or pelt, which isn’t going to benefit anyone.
On average, hunting knives will also have fixed handles. There’s no swinging mechanic, no spring-loaded action, just a fixed blade.
This makes it easier to pull from a sheth on your boot or your hip if you’re in need, and it reduces the risk of self-harm because it’s not on a spring that can go off at any time; instead, it’s in a fixed harness.
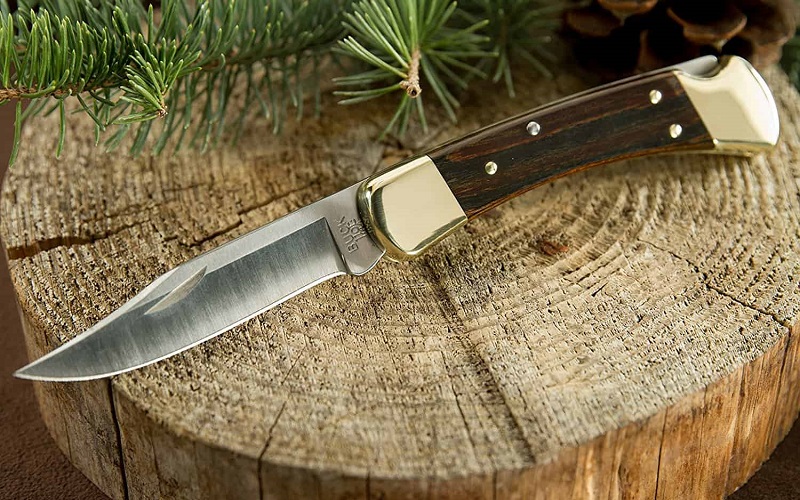
There are hunting knives that fold, but those don’t offer the same strength you need to skin an animal or separate a bone.
While there is a locking mechanism in the handle, it’s just meant to hold the blade in place, not handle the stress and pressure from pressing it down when skinning an animal.
Rigid, sturdy, solid handles are better designed to handle everything you need to do with a hunting knife. Wood and metal make excellent handles, but PVC and plastics aren’t advised.
It’s important to know the anatomy of a hunting knife so you know what to expect while sharpening it.
Your handle will undergo stress and pressure from one angle while you’re sharpening it, regardless of what method you’re using.
Grinding Vs. Honing: What To Do?
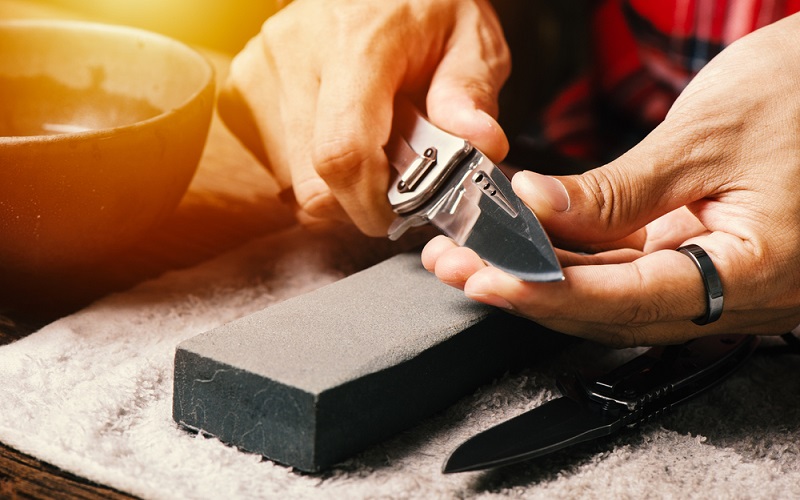
People like to argue that you just need to get a good grind going on your hunting knife to make it effective, but nothing could be further from the truth.
Knife sharpening is like a coin: there are two sides, and you need both of them.
A grinded blade without honing will be basically useless, it ends up dull and blunt, so you can cause damage but without a precise, sharp, and effortless slice.
Honed blades that haven’t been grinded will be sharp, kind of. Honing takes the shaved-down metal (thinner parts) and fine-tunes what’s left to make it sharp, but working with a dull blade to begin with.
All About Grinding
When you grind a blade, you’re bringing a coarse material to the edge of the metal. You’re not sharpening it here, you’re actually chipping away at the metal on a microscopic level. It ends up being left rough and slightly dull, though there may be jagged little snags here and there.
Grinding requires pressure on the blade, which you will supply, and the result is a slightly smaller amount of metal than you started with.
Grinding is done on an old-fashioned whetstone, an electric knife sharpener, or a series of sanding bricks.
All About Honing
Honing takes the metal that you just broke down and gives it a sharp edge. Many people ask, “Why can’t I just hone if grinding just takes the metal away anyway?” Well, honing a dull blade to the point of having a sharp edge would take absolute ages.
Grinding still helps you get a finer point, or bevel, on your knife.
Honing is either done with honing rods or a series of high-grit sanding blocks that take away microscopic layers of metal, shaving it down to the thinnest it can possibly be without breaking.
You can’t do one step without the other if you actually want a good, quality edge to your blade.
A Step-by-Step-by-Step Sharpening Your Knife
There are a few ways you can go about this. First of all, assess your blade. Is it extremely, extremely dull? If it’s super dull, you’ll have a three-stage process.
If it just needs attention, you’ll only have a two-stage process, best-case scenario.
Dull or chipped knives
- Use a sharpener of your choice. You can use sharpening panels, sharpening rods, or our personal favourite, sanding ricks or stones. We prefer sanding bricks to the others because it’s what the Japanese use to fine-tune their world-famous Japanese steel cutlery, and there’s a sharpness to those knives that you don’t want to cross.
- Using your preferred method, start with a very low grit (around 1,000 or so). Because the edge of the blade is chipped or otherwise damaged, we really need to shave it down as quickly as possible. A lower grit is better for removing more metal at a faster rate.
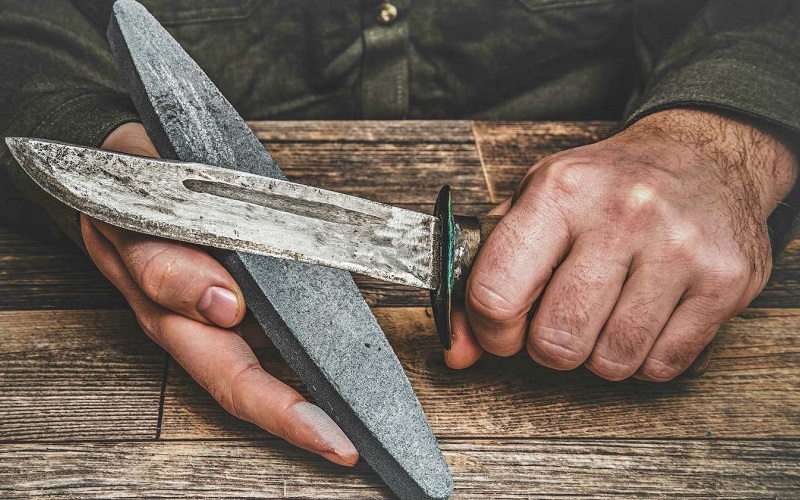
- Stage one is to grind it on this until the chip is virtually non-existent. Hold your blade at a 15° to 17° angle when you hold it against your stone. If you’re using an electric knife sharpener, you might find this a bit difficult to achieve.
- If you’re using a rod or brick, you will hold the blade against the edge of it at the right angle and stroke the blade. Pull the handle towards you with the point facing away from you until the base of the blade (not just the metal above the hilt, but the blade itself) drives all the way to the tip of the knife. That’s one full stroke.
- Repeat step 4 about ten times. Normally this would be lower, but we’re working with chipped and damaged equipment here.
- Bring your knife to stage two, which is a slightly higher grit. You’ll want 2,000 to 3,000 grit on your next sanding block. Complete seven to ten full strokes at the same angle range as before.
- Switch to a high-grit sanding stone. 4,000 to 6,000 is the maximum you should use for a hunting knife.
- Complete five to seven full strokes, and now you’re on stage three. Be careful with how much weight you’re putting on the edge of the blade. 4,000 grit is okay, but above that, you run the risk of bending or warping the edge of the blade with the strength of your hands alone. We want to avoid that.
- Test it by holding the knife so the blade is facing upward. Drop a piece of printer paper on it and see what happens.
Knives in need of maintenance
- Start with a 2,000-grit stone and perform seven to ten full strokes at a 17° to 20° angle. We want to take the U shape of your blade and get it back to a V bevel.
- Inspect the blade. Run three full strokes at a 15° to 17° angle.
- Upgrade to a 4,000–6,000 grit sanding stone. Perform three to five full strokes and inspect the blade. Drop a piece of paper on the direct blade edge and see what happens.
- If step 3 fails, perform step 2 until the desired results are achieved.
Your Guide To Grit Ratings
There are a lot of stones on the market. If you’re going with anything manual at all, you’re going to have to know about grit ratings beyond what we outlined in the step-by-step sharpening guide.
Grit ratings are often marked with a pound symbol, so a 1,000-grit sanding stone will simply be #1000. There’s an almost endless amount of precision sanding stones out there, but these are the grits you need to know about.
- #100: Super coarse; this will shave off so much metal that you might get curled twirls of metal on your bench. This will leave visible marks on the side of your blade, much like an electric sharpener.
- #400: Still very coarse, but it’s not going to do what a #100 will do to your blade(s). This should be used for chipped blades that you’re trying to restore, but do understand that it will still take a good amount of metal off.
- #700: Designed for use on chipped or otherwise extremely dull blades You’ll be able to see a smoother finish compared to the #100 and #400 stones, but this is still considered a very coarse sanding stone.
- #1000: This is the threshold between coarse and fine. #1000 is the height you want to use on a chipped blade. This will help bring it back from the brink, but with a smoother finish.
- #1200: The beginning of the medium grit family #1200 will leave a smooth finish while still sharpening the bevel on your expensive hunting knife.
- #2000: Dead set in the middle of the medium range, it’s the perfect stone level to constantly maintain your knife as it just begins to fade. Use this regularly, and your knives will stay in great shape.
- #3000: You’re on the finer side of the aisle now. This is the highest threshold of the medium range, and it’s a great go-between if you’re trying to gradually build up a super-fine edge on your blade.
- #4000: You’ve entered the ultra-fine category. This is going to give you a razor-sharp edge, and it only gets better from here.
- #6000: Now it’s absolutely pinpoint accurate and sharp as can be. This metal gets so thin and precise that holding it too hard against the stone can bend and warp the metal of the blade, so be careful.
- #8000: You don’t even need a knife this sharp, honestly. You’re so close to making this an unnecessary knife at this point that it might become completely reflective, like a mirror.
- #10000: They literally use this setting to make glass. You don’t need a $1000 brick, and they’re going to cost a fortune anyway. It provides a near-mirror polish. You could make the equivalent of metal and glass dust with this.
How Sharp Should My Hunting Knife Be?
It needs to be sharp enough to expertly clean the game. You only have so much time to waste when you’re skinning a freshly killed animal, and you’re not going to want to mangle the pelt, either. Pelts can go for a pretty penny.
Your hunting knife should have at least a #4000 finish on the edge of the blade to meet these requirements.
The only thing is, after you pass #4000, you’re no longer using something that’s optimised for cleaning games. The metal can bend easily from 4000 onward, getting easier as it goes up, and the muscle tissue in your game will actually start to bend the metal.
Not just the back end of the blade, but the sharp edge will get a warped weave to it and no longer be nearly as effective.
Your hunting knife needs to be able to slice through a piece of printer paper effortlessly, as a test.
From there, you need to be able to store it effectively so it doesn’t lose that edge.
What’s The Perfect Angle For A Hunting Knife?
For hunting blades, 20° is considered the perfect angle. It’s a sharp enough edge that you can cut through wood with ease, but it’s also not so fine that you start enduring metal bending.
In our step-by-step guide, we asked you to keep it at a 15° to 17° angle, because that’s how you’re going to get your sharpest setting.
We also know that it’s difficult to achieve that, so you’ll likely end up with somewhere around an 18–21° angle anyway.
15–17° is what’s used in Japanese stainless steel cutlery.
Japanese steel is one of the highest-calibre metals you’ll ever find, and yet somehow it still sharpens fairly easily while remaining as durable as can be. Anything over a 21° angle, and you’re going back into bunt object territory.
Do You Have To Sharpen Drop Points Differently?
First of all, what are you doing with a drop point for hunting? But no, you don’t have to sharpen it differently. The motion of a sanding brick or sanding sheet will take care of that drop point and make it nice and sharp.
You’ll notice that the blade begins to bow inward near the tip, but that’s okay; while you follow the contour of the stone’s edge, you’ll also be effectively handling all of that area.
Does Sharpening Remove Carbon Fibre Finishing?
Carbon fibre edges are not meant to last. You’ll see carbon fiber-steel-finished blades all the time, but they’re actually geared more towards self-defence than hunting. If you’re using a carbon fibre knife at all, for any reason, just know that the edge is going to wear down relatively quickly.
The appeal of carbon fibre is that it’s corrosion-resistant, so you won’t have to worry about your knives rusting at all.
Well, stainless steel is also corrosion-resistant, and any knife can last if you just take care of it. Carbon fibre coating will come off with sharpening, and it leaves a noticeable difference in the aesthetics of a knife.
Coated blades generally aren’t ideal for hunting anyway, since you could be introducing bits of coating or metal into the flesh of your game.
It’s not good for the pelt, and it certainly isn’t good for the meat you collect.
Why Shouldn’t I Use An Electric Knife Sharpener?
Electric knife sharpeners are good for kitchen cutlery that you didn’t spend a lot of money on.
They will keep basic non-serrated kitchen knives sharp for quite some time, but they also leave marks on the outside of your blade.
The bevel setting and angling that these have aren’t what you should use for a hunting knife.
The bevel is basically the angling of the point and the way it climbs up to the rest of the blade.
The back end of your blade is obviously thicker than the edge, and the bevel dictates the force behind the cutting motion, so you want a chisel-like V-shaped bevel every single time.
Sharper Edge, Sharper Focus
Nothing is better than knowing your gear is operating at peak performance and efficiency, so it’s time to hit the road and get back to nature.
You’re going with a sharp self-defence weapon, a tool that you can use for numerous reasons, and peace of mind in knowing that you’ve got this covered. Sharpening your knives should be done regularly, so it’s wise to invest in a good set of sharpening stones to carry you through the years.
If you fancy yourself an avid hunter, then you’ll get some use out of this before long.
Resources:

